| Level Name | Record | Player | Date | Links |
|---|---|---|---|---|
| Misty's Long Bony Road | OCD | naveed_rizvi | Aug. 17, 2014 | [Link] |
| Incineration Destination | Goal | naveed_rizvi | Aug. 7, 2014 | [Link] |
| Beauty and the Electric Tentacle | Goal | naveed_rizvi | Aug. 6, 2014 | [Link] |
| Hang Low | OCD | naveed_rizvi | Aug. 3, 2014 | [Link] |
| Volcanic Percolator Day Spa | Goal | naveed_rizvi | Aug. 2, 2014 | [Link] |
| Impale Sticky | OCD | naveed_rizvi | Aug. 2, 2014 | [Link] |
| Water Lock | Goal | naveed_rizvi | Aug. 1, 2014 | [Link] |
| Weather Vane | Goal | naveed_rizvi | July 26, 2014 | [Link] |
| Genetic Sorting Machine | Goal | naveed_rizvi | July 26, 2014 | [Link] |
| Water Lock | OCD | naveed_rizvi | July 24, 2014 | [Link] (D) |
|
An improvement on one of my oldest records. - comments from player
|
||||
| Chain | Goal | naveed_rizvi | July 22, 2014 | [Link] |
| Drool | OCD | naveed_rizvi | July 22, 2014 | [Link] (D) |
|
19 sec is possible! - comments from player
|
||||
| Impale Sticky | Goal | naveed_rizvi | July 21, 2014 | [Link] |
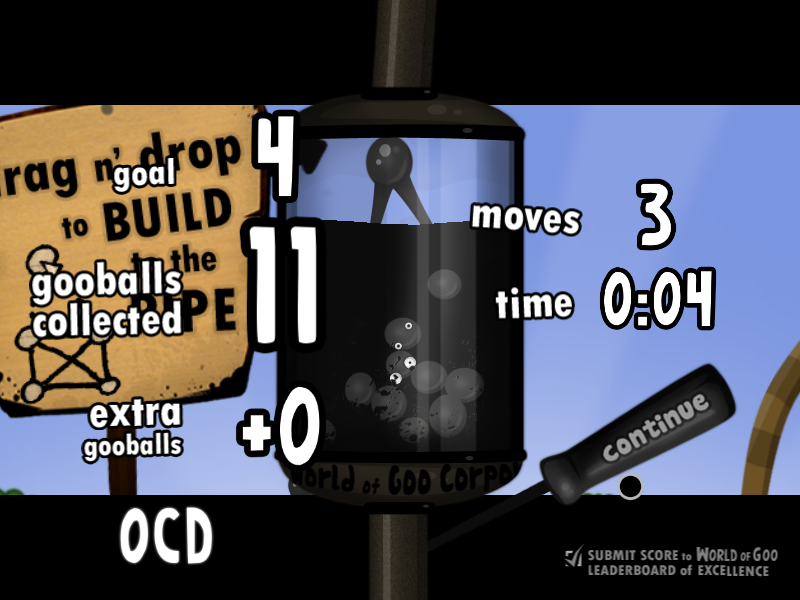
| Going Up | OCD | naveed_rizvi | July 16, 2014 | [Link] [Download] (D) |
|
Announced on 16th July with a screenshot. Video made on 22nd. - comments from player
 |
||||
| Hang Low | Goal | naveed_rizvi | July 12, 2014 | [Link] |
| Horizontal Transportation Innovation Committee | Goal | naveed_rizvi | July 12, 2014 | [Link] |
| Drool | Goal | naveed_rizvi | July 2, 2014 | [Link] |
| Upper Shaft | Goal | naveed_rizvi | June 29, 2014 | [Link] (D) |
|
13 could be possible as the continue button came a bit slow and if you can do it just a bit faster. I honestly think this is the fastest - comments from player
|
||||
| Regurgitation Pumping Station | Goal | naveed_rizvi | June 27, 2014 | [Link] (D) |
|
A new record! - comments from player
|
||||
| Observatory Observation Station | Goal | naveed_rizvi | June 27, 2014 | [Link] (D) |
|
Another record. This might not look like 31 seconds but it is! - comments from player
|
||||
| Deliverance | OCD | naveed_rizvi | June 24, 2014 | [Link] (D) |
|
I am not sure if this a new record or not. I would appreciate it if you would help me get the correct time down. - comments from player
|
||||
| Beauty and the Electric Tentacle | OCD | naveed_rizvi | May 24, 2014 | [Link] (D) |
|
17 seconds could be possible. - comments from player
|
||||
| Upper Shaft | 64 Balls | ptr231 | March 23, 2014 | [Link] [Download] (D) |
|
This takes advantage of a glitch in the game where if you click really fast on a detachable ball it'll cause it to get stuck at the spot it was clicked and always pull back towards there when moved. The more you click on it, the stronger it'll become, i.e., the less you'll be able to move it. This force comes in handy for ripping structures apart.
There's a trick used that lets you move a speed-clicked detachable ball (here an Ivy) further than it would normally. There's two ways it can be done: The first and simplest way - the one I used here - is to use the mouse wheel - just pick up the ball and spin away. The only problem though is that you can only move it vertically. The second way is useful if you don't have a wheel (or want to move horizontally). Go into windowed mode (Alt+Enter), then get hold of the Ivy and quickly move the mouse out of the game window, now quickly move the mouse back in and out of the window on the side you want it to go and the Ivy will start moving as far as you want. Here's a vid demonstrating it. http://www.youtube.com/watch?v=LB9ik9J9BRs ------------------ The main new trick that made me do this record was the blowing up of the walls while retaining the UtilNoAttachUnwalkables. This was made possible by a known glitch - referred to as the Timebug Fuse glitch - where popping a Timebug while Fuses are burning will stop the fire from spreading. For it to work, you'll need to create a specific point for the Timebug to revert back to - so attach a ball (anywhere) when the burning has reached where you want it to stop, then pop the bug. For this level you dont want the burning to spread at all, so you do this as soon as possible. It seems so obvious now, but no one must of thought of using the glitch in this level before; in fact, this is the first time its been used for a record. Each element of this record isn't really all that difficult in theory, they're just a bit tricky and time-consuming (hence the 2 hours it took me), especially the breaking up of the Commons and Fuses - that alone took 50 minutes! Ivys are the most important ball, so make sure not to collect ANY until the very end. When you see me continuously attaching and detaching an Ivy, its so that if I use up all the Timebugs it doesn't revert back to a previous state and lose where I was up to. You'll see this being done in other max goo records as well, except using a Balloon or Bone. Leave a comment/message if you have a question that isn't already answered below, or find a better way of doing something (i.e. the wall blast section), then I could add it to this description. -----Commentary----- 00:57 - It takes between 3 and 4 minutes for the bomb to start rotating. There might be a faster way to get it going, but I never tested any. I just copied what DaB did in the old record. http://www.youtube.com/watch?v=cfomWPbzP5U 01:27 - The strand should always snap at that spot if you copy me exactly. The other two possibilities are: 1) it snaps slightly earlier on the very bottom corner of the cage, or 2) it doesn't snap at all and carries on being pulled around the cage until it eventually does. 01:40 - You want the rotating to stop so the fuse ball attached to the bomb ends up in the top right corner. To do this, just attach an Ivy TWICE when it gets there and pop a Timebug. 01:45 - It's important to attach an Ivy here to stop it slowly rotating any further (which it will if just left). 03:27 - When building the chain, make sure to alternate between Ivys and Fuses so you're able to dismantle it. It also means you'll have some needed Ivys left over. 03:49 - I attach another Ivy at the top so it doesn't snap as easily when bouncing the cage. Also, it pulls the cage up a bit higher so it springs back up further for exploding the walls. 04:13 - This is one of the more trickier parts, just for the fact of how random it can be. I'll go through each bit:- About that fuse ball: you wanted it on the right side so you're able to use the left side to hit the cage. If you do it the other way round you run the risk of accidently killing the ball on those spinning gears. And you wanted it in the corner so that the length of the strand between the bomb and the fuse is as long as possible - you want this because the longer the strand the more time it'll take for the burning to reach the fuse. The distance you have to knock the cage down will stretch the chain to its limits (especially when going for 64 where you have to use the short snapped off fuse line as part of the chain), so it can easily snap if you hit it slightly too far. Once the bombs alight and ascending again, give the chain a helping kick upwards to speed it up. For the final part you need to attach a ball just before the cage reaches its maximum height, then straight away, click a Timebug. What should happen is the bomb will explode and break the walls, and the spread of the burning will stop so the UtilNoAttachUnwalkables are still attached and hanging there. Now, most of the attempts are going to end in failure - so the balls will still be burning or the walls didn't break - but if you do everything 'right' then it should work sooner or later. Like I said before, it seems very random. About timebugs: you'll need to create some more once you've had two failed attempts, so here's some tips. Obviously, the spare 7 balls will give you some more, but once they run out, the first thing you can do is swap the 'used' Ivys with the ones that make up the chain. Then, if you still need more you'll have to start using the Commons. The easiest way is to simply connect up to them through the wall with an Ivy, but you have to make sure not to let any GooProduct through. Once Commons are 'used', you should really throw them back through the wall to lessen the weight on the chain. 06:53 - In previous records you'd collect the Anchor, but here you have to sacrifice it in order to free 3 more balls, although you're only really gaining 2 more seeing as you have to make up for the Anchor. The extra 3 you get are, 2 from the block of Commons and 1 from the snapped off fuse line from the cage. Its easy to know where to stick the Anchor - there's three dark stripes on the wall, you want to aim for the middle one. 07:03 - This is the first of 4 speed-clicked balls you need to make. Its not as difficult as previously thought to do it on Ivys - the trick is to let the ball move about as much as possible, so what I do is leave it hanging by one strand. This ball doesn't need any strength to it, so a weak one's fine. 09:18 - The only interaction you can have with the Utils is knocking them when they're detached, so thats what you have to do to collect the first two. Line up the second to bottom ball with where the wall bends round into the pipe area, so that when you push the chain into the wall, the ball dies, freeing the bottom one for knocking. Like me, you'll probably have to turn up the brightness to be able to see the Utils over the black background gears. 12:16 - Looking back at this, it would've been easier to just attach the ball at full stretch here so I didn't have to do the bit at 12:30. Anyway, you want the strand long so it pushes the Utils out of the pipe and the fuse ball goes right near the 'spikes'. 13:20 - I connect up here to keep the pipe active once the fuse gets killed so the Utils get sucked in. 13:27 - Here's where you kick the strand to kill the fuse. Make sure to keep the hitting ball within the suction radius or it'll just fall and die. You can afford to accidentally collect a few balls like I did before having to revert back in time (you dont want to trigger the continue bar). 16:00 - Always use a Common as the connecting strand. A fuse isn't as strong so it would snap before pulling off the roof Common. 16:48, 17:25 & 17:40 - Take note of the position where I speed-click each of these 3 balls, and also of how strong you need them to be (the distance they can be moved). 17:57 - I connect a ball to this and the higher up speed-clicked ball so they cant walk on the structure while snapping the Common off. 18:31 - This is where the Anchor comes into play. The ball freeing process comes in two stages: the first, where you attach to the Anchor and rip a ball off the structure; the second, snapping the ball off the Anchor. The first thing to do is release the roof Common; I didn't have the catching chain in place when I did this so had to manually catch the connecting strand ball. The catching chain is self explanatory; its primarily used to catch stray balls from the second stage. 19:27 - Notice that the ball wouldn't reach the first time I brought it down - this happens when you dont get the screen view (camera) far enough to the left. 19:56 - When pulling on the strand like this you dont want the Common to go too far round the corner or you might get the released strand ball trapped inside the wall. 21:15 - Most of the time I place the Ivy on near the Anchor - if you place it lower down on the structure, the sudden jolt upwards can jam it into the wall. Sometimes I used the low speed-clicked ball to hold up the structure, in which case it doesn't matter where you place it. 21:27 - I didn't want it to break off like this, but if it happens, just reconnect it and try again (or use a Timebug; I didn't want to waste any though). 24:09 - Once you've separated the Fuses you can kick an Ivy line to the pipe and start collecting everything. Start first with the strong high up speed-clicked Ivy because its not a straight forward ball to put in. When its moved that far down it wont stay far enough away from the top of the screen for it not to move upwards, so you have to time the release of the ball as its pulled across the pipe. ------------------------ 62 ball method: If you're up for attempting this record but dont want to bother with all that Common snapping stuff just for 2 measly balls, then you could try this easier 62 ball method:- I'll be referring to these mock images during the explanation. http://wogfan.rf.gd/62b.ref.img.jpg Start the level as usual, but dont bother saving the whole Fuse strand, just kill one like in the old record. Once the wall blast part is dealt with, go up and make the speed-clicked ball, then come back down and kick the Anchor into the pipe as part of a line with an Ivy. This line will now be used to collect the first 2 Utils - once they're in, pull the Ivy to collect the Anchor, and carry on with getting the other 2. When all 4 Utils are in, kick a line (preferably made up of an Ivy and Fuse to save on Ivys) into the left area and put all the Commons on it. Now swing the chain over and connect to the top of the block of 4 Commons (like in the old record), then swing it to the right and kill ONLY the bottom right ball on the gear so you're left with a triangle. Bring the speed-clicked Ivy down and attach it to that triangle; disconnect the chain from it and connect it up to the roof Common like in this record - but make sure this ball (1) is the one that gets attached to. Now go and make the lower speed-clicked Ivy and pull it off like normal. Now hang the structure like this (2) and attach an Ivy where shown; kill this ball (3) on the gears and catch the freed strand ball; then detach the Ivy to free what was the roof Common. You're now left with a Common line which has to be put in the pipe the correct way - if its not then the ball in the pipe wont go in when the lower one dies on the spikes. Knowing which one all starts at the beginning -{when starting the level, go down and take a look at the block of Commons - make sure the top right and bottom left balls are different sizes so you can tell them apart; its the top right one which goes in the pipe}. Now you need to position the line so the pipe ball is at the bottom of the chain. It may already be there, or you may have to turn it round. The two different outcomes occur during the roof Common removal - as the Ivy yanks down it can buckle the triangle and force the connecting ball (1) over to the other side. Its this buckling that causes the need to turn it. Getting it in the pipe requires a similar process to the Utils in this record, only its a lot easier here since you can kick the Common line over (4). Once its in, attach 2 Ivys to it like this (5), detach the chain, and collect every ball. The only thing left to do now is quickly detach and collect the 2 Ivys so the Common falls on the spikes and dies, letting the other one into the pipe. You'll notice that the new way to deal with the remaining Common strand is a hell of a lot better than the previous records way. It cuts out almost any risk of failure - as long as you're not too slow placing the Ivys in. Obviously, the reason it works is because you use the longer diagonal strand instead of the shorter top one. - comments from player |
||||
| Tower of Goo | OCD | dahkjdas | Aug. 22, 2013 | [Link] |
| The Server Farm | OCD | ptr231 | Aug. 18, 2013 | [Link] [Download] |
| The Server Farm | OCD | dahkjdas | Aug. 18, 2013 | [Link] |
| Blustery Day | 5 Moves | ptr231 | July 29, 2013 | [Link] [Download] |
| Drool | 2 Moves | ptr231 | July 28, 2013 | [Link] [Download] |
| The Red Carpet | Goal | ptr231 | July 26, 2013 | [Link] |
| Tumbler | OCD | naveed_rizvi | July 17, 2013 | [Link] (D) |
|
This is the fastest I think. :) - comments from player
|
||||
| Fly Away Little Ones | OCD | naveed_rizvi | July 17, 2013 | [Link] (D) |
|
14 is possible. 13 might be the least. - comments from player
|
||||
| Infesty the Worm | OCD | worldofgooballs | July 10, 2013 | [Link] |
| MOM's Computer | 0 Moves | ptr231 | July 9, 2013 | [Link] [Download] |
| Infesty the Worm | OCD | worldofgooballs | July 7, 2013 | |
| Second Hand Smoke | OCD | ptr231 | May 21, 2013 | [Link] [Download] |
| Product Launcher | Goal | ptr231 | May 20, 2013 | [Link] |
| Graceful Failure | Goal | ptr231 | May 12, 2013 | [Link] [Download] (D) |
|
The aim is to get the triangle shoved through the side wall right where the pipe is. Ideally you'd want to get the whole thing wedged in (like I think I do) for maximum collection speed. If only two corners go through then you'll most likely not get them as fast. - comments from player
|
||||
| Graceful Failure | Goal | ptr231 | May 10, 2013 | [Link] |
| Graceful Failure | Goal | ptr231 | May 9, 2013 | [Link] |
| Graceful Failure | Goal | ptr231 | May 9, 2013 | [Link] |
| The Server Farm | 2 Moves | ptr231 | April 18, 2013 | [Link] [Download] |
| Weather Vane | 9 Moves | ptr231 | April 16, 2013 | [Link] [Download] |
| Bulletin Board System | 16 Balls | ptr231 | April 11, 2013 | [Link] [Download] (D) |
|
A balls angle of rotation / spinning motion will be stored while its attached as a strand - so upon release it'll resume as it was. Also, a strand ball will always be released at the centre point between the two balls it was attached to.
Getting the strand ball (1:57) back is all to do with its rotation. If it's attached at the angle shown, it means that when the other ball dies on the gear, that strand ball will reappear with one corner of it slightly inside the geometry. It's this that causes the ball to jump out away from the gear. Also, that angle is just right so it misses touching the gear itself. You'll notice that the ball gets thrown off high enough that it actually lands on the structure - this was just really lucky and totally unexpected. Normally you'd have to do a bit of juggling with all 3 balls until they were safe. - comments from player |
||||
| Horizontal Transportation Innovation Committee | 64 Balls | ptr231 | March 19, 2013 | [Link] [Download] (D) |
|
This takes advantage of a glitch in the game where if you click really fast on a detachable ball it'll cause it to get stuck at the spot it was clicked and always pull back towards there when moved. The more you click on it, the stronger it'll become, i.e., the less you'll be able to move it. This force comes in handy for ripping structures apart.
There's a trick used that lets you move a speed-clicked detachable ball (here a balloon) further than it would normally. There's two ways it can be done: The first and simplest way is to use the mouse wheel - just pick up the ball and spin away. The only problem though is that you can only move it vertically. The second way - the one I used here - is useful if you don't have a wheel (or want to move horizontally). Go into windowed mode (Alt+Enter), then get hold of the balloon and quickly move the mouse out of the game window, then quickly move the mouse back in and out of the window on the side you want it to go and the balloon will start moving as far as you want. Here's a vid showing it - http://www.youtube.com/watch?v=LB9ik9J9BRs You can tell I'm using this way because of the slight pauses you can see as I switch between windowed and fullscreen. - comments from player |
||||
| Weather Vane | 108 Balls | ptr231 | March 13, 2013 | [Link] [Download] (D) |
|
This takes advantage of a glitch in the game where if you click really fast on a detachable ball it'll cause it to get stuck at the spot it was clicked and always pull back towards there when moved. The more you click on it, the stronger it'll become, i.e., the less you'll be able to move it. This force comes in handy for ripping structures apart.
There's a trick used that lets you move a speed-clicked detachable ball (here a balloon) further than it would normally. There's two ways it can be done: The first and simplest way is to use the mouse wheel - just pick up the ball and spin away. The only problem though is that you can only move it vertically. The second way - the one I used here - is useful if you don't have a wheel (or want to move horizontally). Go into windowed mode (Alt+Enter), then get hold of the balloon and quickly move the mouse out of the game window, then quickly move the mouse back in and out of the window on the side you want it to go and the balloon will start moving as far as you want. Here's a vid showing it - http://www.youtube.com/watch?v=LB9ik9J9BRs You can tell I'm using this way because of the slight pauses you can see as I switch between windowed and fullscreen. The extra 108th ball that I get is from a glitch that happens very rarely where the far left part of the structure doesn't stick down. It can take hundreds of retries to get it. I experienced some extreme framerate drops on two occasions during the recording. The first one happened during the part at 8:52 (real-time 23:00), so I had to stop and start Fraps again (which corrected it). Same thing for the second one at the end, only this time it wouldn't continue to run smoothly anymore. The problem must've been caused by either me not having the "Split movie every 4 Gigabytes" option checked, or because I was running low on disk space. - comments from player |
||||
| Tower of Goo | Goal | ptr231 | Jan. 9, 2013 | [Link] |
| Tumbler | Goal | ptr231 | Jan. 7, 2013 | [Link] |
| Impale Sticky | 5 Moves | ptr231 | Dec. 23, 2012 | [Link] |
| The Server Farm | Goal | ptr231 | Dec. 20, 2012 | [Link] |
| Flying Machine | Goal | naveed_rizvi | Dec. 18, 2012 | [Link] (D) |
|
9 second should be possible. :) - comments from player
|
||||